
How to convert audios from DVD to OGG Vorbis with DVD Audio Extractor
Summary:
This tutorial shows you all the details about how to extract audios from DVD-Video with DVD Audio Extractor, save them in OGG Vorbis format, and then playback on your personal computer.
Software used in this tutorial:
Step 1: Select the chapters you want to extract
-
Insert the DVD you want to extract, and launch DVD Audio Extractor. The contents of the disc will be shown up automatically.
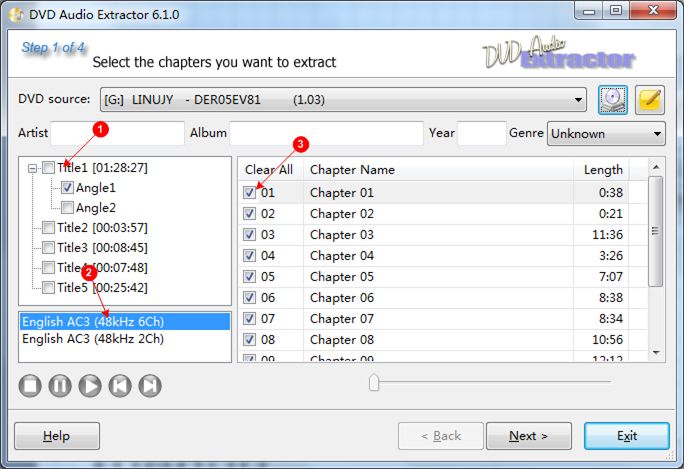
By default, DVD Audio Extractor activates the first title and lists all its chapters. You can click on any title that you are interested to change the active title (
 ). If there are more than one angle available on that title, click on the specific angle. The chapters of the selected title will be listed.
 - Now click on the audio stream you want to use to select it (
 ).
). - (Optional) By default all the chapters on the first title is selected. To change your selection, click on the check box before each chapter (
 ).
). -
(Optional) Edit disc metadata.
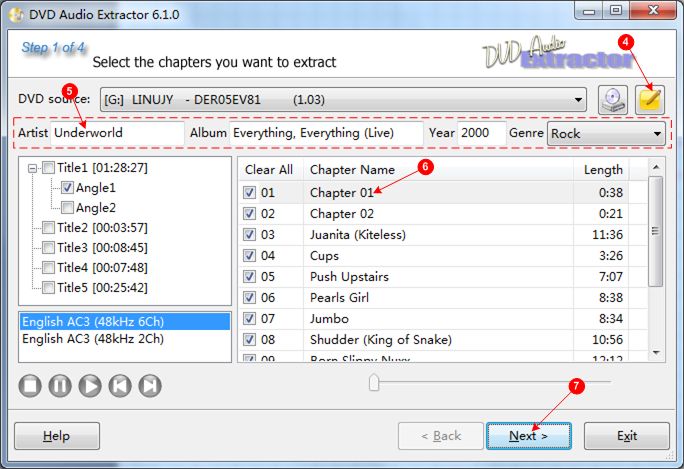
Click at the Metadata button (
 ), and select Download metadata from db from the poped up menu. This will download metadata for this disc automatically if avaliable.
If no metadata for this disc has been uploaded before, you could enter them manually. Input information like artist name, album name, the year the disc is created, and select a genre (
 ). You can also click at the chapter names to change them (
 ).
).All those metadata information will be saved into result files as Vorbis tags. They could also be used as output file name, if you enable that in step 3.
- Now click on the Next button to proceed to next page (
 ).
).
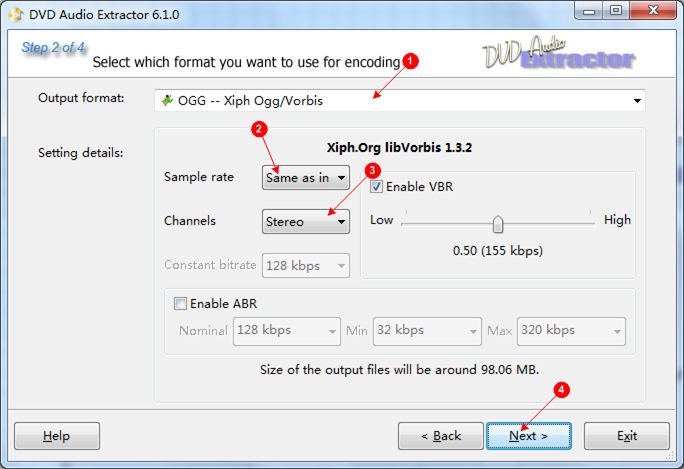
Step 2: Select which format you want to use for encoding
- Make sure that OGG/Vorbis is selected as output format ().
- (Optional) Now select the output sample rate you want (). Unless you have spacial needs, it is always good to use the default Same as input here. That means no resampling operation will be done and you can get the best quality and fastest extracting speed.
- (Optional) Select the output channel you want (). Stereo is good for general use but if you want to keep all the 6 channels, you can also select 5.1 Surround here.
- Now click on the Next button to proceed to next page ().
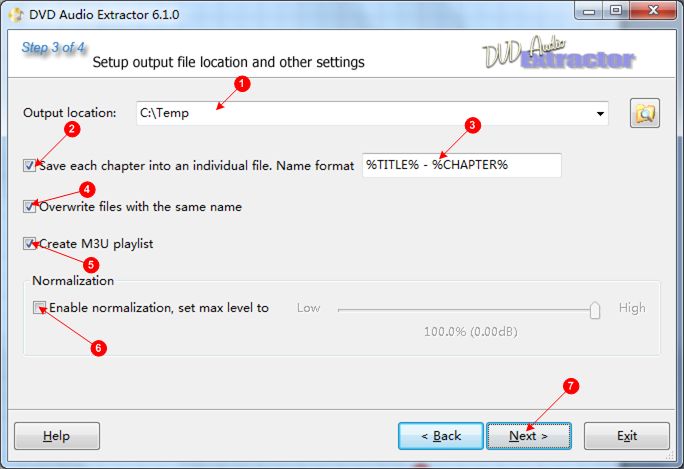
Step 3: Setup output file location and other setting
- Select the output folder where you want to put the extracted audio files ().
-
(Optional) Select the option Save each chapter into an individual file (
). Otherwise everything will be saved into a single output file.If you enabled this option, you could enter a name format you want to use (
). Name format must contain at least one of %CHAPTER% and %INDEX%. See user manual for all the supported macros. - (Optional) Select the option Overwrite files with the same name (). When not selected, suppose your have a selected chapter called "Chapter 01", and there is already a file "Chapter 01.ogg" in the output folder, then this chapter will be skipped.
- (Optional) Select the option Create M3U playlist (). This is useful for playback all the extracted files later.
- (Optional) If you want, you can select Enable normalization and change the output audio level (). This could be useful because DVD audios are usually recorded for quiet listening environment. Just keep in mind that normalization will take additional processing time.
- Now click on the Next button to proceed to next page ().
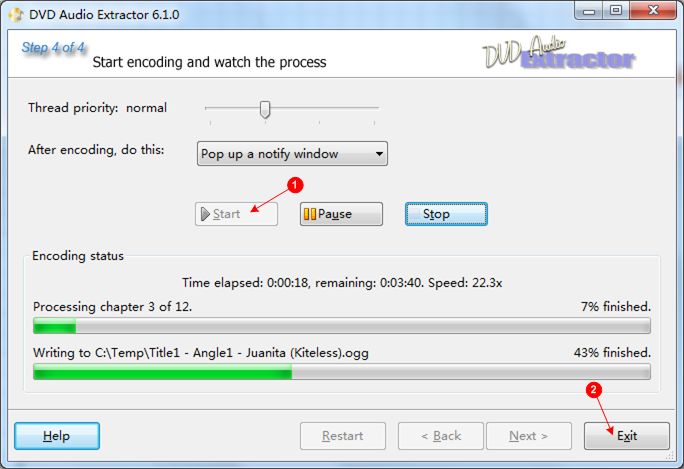
Step 4: Start encoding and watch the process
- Click on the Start button to start the encoding process ().
- When finished, click on the Exit button to quit DVD Audio Extractor ().
Step 5: Playback the extracted audios with foobar2000
- Launch foobar2000. Select menu Playlist->Open. A file open dialog will show up. Browse to the output folder you setup at step 3, select the just created M3U playlist file and click Open.
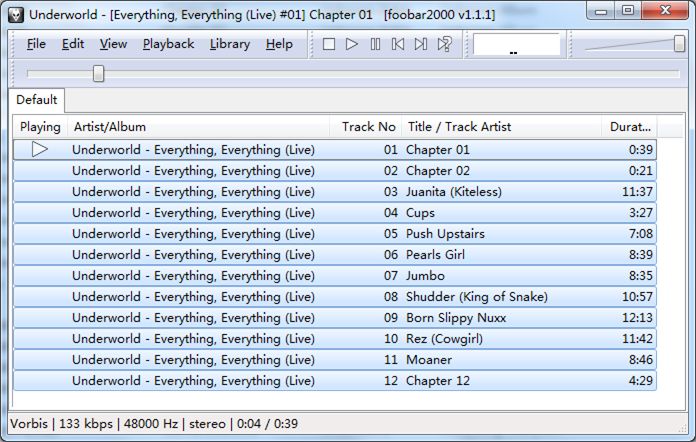
- Foobar2000 will start playing the extracted songs automatically. Enjoy the music!